Showing posts with label DIY. Show all posts

Weekend Recap {Halloween & Projects}


Hey everyone! I hope you all have a great weekend and did something spooky and fun in celebration of Halloween. We went out to a local bar for their Halloween party and it was a blast. We decided to dress up as Forrest Gump and Jenny this year. The outfit was super easy to pull together because we had almost everything in our closet. We just purchased Mark's bubba Gump hat, a ping pong paddle (only $3 at Walmart!) and I purchase a few items to make my head band. Easy!


His ping pong paddle was a huge hit!

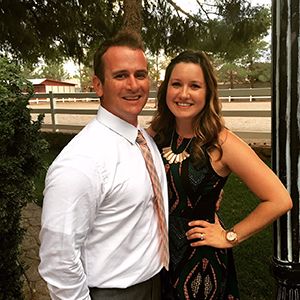
at the gender reveal

The rest of the weekend was spent at a friend's gender reveal party and working on the house. Our friends are having a boy... congrats! So exciting! As far as our projects go, we got a ton done. We (well mostly Mark) finished the dining room table. I am so dang excited with how it turned out!! Mark is pretty amazing and can look at most anything and make it happen. I picked out the color of the stain and then stained the base and bench. He did much more work than me lol but I'll claim my portion! It looks great in our dining room and every time I catch a glimpse of it I smile. I feel like we are real grown-ups and can finally have people over for a meal! Who wants to be our first dinner guests??

a close-up of the bench and a cute doogie in the background


I love the rustic look of the tabletop!

Mark found the table legs on Amazon. Love them so much!

Chairs

I have been waiting to bust out this centerpiece I got at Kirkland's during their blowout Fall sale. I am missing a candle still but it will do for now. Also, I couldn't find a table runner that I liked so I used a blanket lol. I like how it turned out though! Kinda looks like a scarf from this angle...

Mark also worked on our shiplap wall for our bedroom. Now all that's left is paint which we should get done this week. You'll have to check out my One Room Challenge post on Thursday to see pics of the completed wall :)

It was a great weekend and so fun to have two full days together. That never happens! I hope you all had a great Monday and can't wait to see adorable pics of your little ones on Halloween.

...and because they are just the cutest, two more pics!


DIY Fall Sign


Hi everyone! I'm back today with a fun little DIY project that I finished over the weekend. I knew I wanted something for my front door but wasn't feeling the wreath I made last year. It was just too small. Plus I have been dying to use my Silhouette Cameo for more projects. So I started scrolling through some Pinterest ideas and combined a bunch that I liked.


For this project you will need:
- a wood sign: I found mine at A.C. Moore
- sand paper
- a stain or paint color of your choice
- paint brush
- a stencil or vinyl cutout of the words
- fake leaves or garland
- hot glue
- twine to hang your sign (mine already had twine attached)
- felt pads (for the back of your sign)

I started by sanding the wood sign. I used a 100 grit sandpaper and then moved my way up to 220. If you have a sandpaper block it makes sanding much easier. Then I applied the stain. One word of advice... wear gloves! I splattered it on my feet and hands because I was staining it on my deck. It was sooo hard to get the stain off my skin lol.


It took quite awhile to dry and I think that's because I didn't wipe off the excess stain. I will for sure do that next time. In the meantime, I used my Silhouette cameo to make the lettering. I picked a font and welded the letters together, then printed on white vinyl. I transferred the vinyl onto the transfer tape and then applied it to the wood sign when it was dry. This process takes forever because you need to use a scraper or a wooden popsicle stick to get the vinyl to adhere. It probably took close to 30 minutes for it to actually work.


Next, I unraveled the garland pieces to make it more manageable to work with. I placed it around the wording until I was happy with how it looked. Then I just started glueing some pieces down. I'm not very good at hiding the hot glue but I did my best, and voila, it was done! I really like the way it turned out! :)


Weekend Recap {Backyard DIY}

cheesin' it after breakfast on Saturday

Happy Monday everyone! I was actually in such a good mood this morning but it's probably because I had a long weekend. I was home from work on Thursday and Friday because I had some doctor's appointments. Even though I had to lay low those days, I was still able to sleep in :) Win in my book!


We spent a good chunk of the weekend working on the backyard. When I say we, I mean mostly Mark and our friend Greg. I did help with the plants but that's about it haha. My hubby is super handy and I was even more impressed than normal when he whipped up these planters. We got the wood on Friday afternoon and him and Greg put them together in no time. They look awesome! Our pups thought they were pretty awesome as well lol.


 He also made this bench, and this little table to camouflage the propane tank for the fire pit. I can't wait until it gets cool enough to use.


On Sunday, we brought our friends Spencer and Rob some dinner and were able to see their new little one, Charlie. He's so precious!


Afterwards, we went on a date night to the Brigantine. It was nice to relax and let someone else make a meal for us :) It was a great weekend and I'm really looking forward to next weekend when my Grammie comes to visit. Should be fun! Have a great day everyone.

Super Easy DIY Tissue Paper Pom


I am hosting a baby sprinkle this weekend so I have been crafting a few decorations. Some of the decorations are these tissue paper poms. It's an easy and relatively inexpensive way to spruce up a space for any event. I made about 20 of these for a shower last year but they were a bigger size. It didn't take me long to realize that the larger sized poms take forever to make and they also take so much paper. This method is so much easier!

Supplies: 
1. tissue paper (6 sheets per pom) *I used the 16.5 x 24 size
2. clear fishing wire
3. scissors


1. Take 6 sheets of tissue paper and fold it in half (hot-dog way). 


2. Fold it in half again to get a good crease.


3. Cut it in half and unfold the paper. Lay the stacks on top of each other.


4. Accordion fold the tissue paper in strips about 1.5 inches. 


** Make sure to go over the creases several times.


5. Take out four sheets at a time and refold them. Use your scissors to cut a rounded end on each side. This gives the pom it's shape. Repeat the same steps until you have done this to all of the paper. 


6. Re-stack the papers on top of each other and fold back up. 


7. Measure out the fishing wire to the length that will work for you. When I made the poms last time I had planned on hanging them from a ceiling. I left the wire extra long to allow me to hang the poms at various lengths. This time they are just sitting on a table so I don't need a long wire. *Tie it tightly in the middle.


8. Fan out the sides of the pom. Turn it sideways and lay it in between your knees. I found this to be the easiest method. Take a piece from the left side and right side and start to fan it out. Rotate the tissue paper so you are now spreading out the paper from the other side of the wire knot. 


9. Keep moving in a circular motion until all of the paper is fluffed and spread out. Go back in and spruce up any areas that need a little more fluffing. Move the paper around so there are no bare spots. 


Now you're done! I've made these with all different colors but I needed white this time around. I think a patterned paper like polka dots would be adorable as well! 


Simple Valentine Wreath


I love making wreaths for our front door. It's an easy way to add something festive to our rather drab front walkway. We still had our pine wreath on our doorway as of this weekend, so I knew it was about time that I made something new. I was looking around Pinterest for some cute Valentine ideas and I decided to try a yarn-wrapped wreath. I always use burlap with a wire wreath base, so I was excited to try something new. I intended for the wreath to be much more valentine-esque but it ended up looking more like a spring wreath. Oh well, at least I'll be able to use it longer than just this month.

1. Collect your crafting items:
- hot glue gun
- small straw wreath
- wide ribbon
- flower embellishments (I cut the flowers from leftover ribbon I had on hand)
- yarn
- scissors


2. Start wrapping your wreath with the yarn. Keep the plastic on, it makes it a lot easier. I tried a bunch of techniques to make the wrapping go faster but I finally figured out it was going to take awhile no matter what lol. I recommend listening to a podcast or audiobook to pass the time :)


3. Wrap some of the wide burlap ribbon around the side of the wreath, overlapping the pieces. Hot glue them in place.


4. Place the flowers on the ribbon until you get the desired position. A variety of felt flowers would look super cute!


5. Add ribbon to the top so the wreath is able to hang.


Last Minute Christmas Table Decor

So we've been to the grocery store almost everyday and Target several times, but somehow we overlooked the table decor. Ugh! We usually try and craft something for place cards but didn't think of it until today. Luckily, we had a couple things to throw together and I think they turned out pretty cute. We plan on placing them on top of the napkins.


Supplies:
twine or ribbon (red would be super cute)
candy canes
garland or snip a few pieces off your tree
printable tags or gift tags
scissors
hole punch


Directions:
First, I printed these cute little tags from this blog. I used one for a gift in a mason jar and then decided to print more for the table decor. I hole punched each so I could string the twine through it. Then, I snipped a few pieces of greenery off a bouquet that my mom got this past weekend. We have a fake tree so I didn't want to start cutting pieces off of it lol. I placed the greenery and candy cane on top of the twine and tied the printable tag to it. Voila.... simple and cute Christmas table decor :)


Merry Christmas everyone!